 Save to Pinterest
 My nephew bounced into the kitchen during his baseball tournament weekend, and I suddenly realized I'd promised to bring something fun for the team's celebration. Rummaging through my cupboard, I spotted chocolate chips and got inspired—what if I made brownies that looked like baseballs? Two hours later, after piping tiny white icing laces onto dark fudgy bites, I watched his face light up when he opened the container. Those brownie bites became the hit of the snack table, and now they're my go-to whenever someone needs a theme that feels both celebratory and ridiculously easy to execute.
I remember standing in my kitchen on a humid July afternoon, my hands sticky with melted chocolate, when my daughter peeked over the counter and asked if she could pipe the icing. What started as me wanting a quick project became this quiet moment where she carefully drew those little lines, tongue poking out in concentration, turning each bite into her own creation. That's when I realized these brownies weren't really about the recipe—they were about the excuse to slow down and make something together.
Ingredients
- Unsalted butter: Use real butter, not margarine, because it gives you that clean chocolate flavor without interference—melting it with the chocolate creates a silky base that makes these brownies taste homemade in the best way.
- Semisweet chocolate chips: Quality matters here since chocolate is the star; I learned this the hard way after using bargain chips and getting a waxy texture instead of that satisfying snap.
- Granulated sugar: This sweetens the batter and helps create that slight crust on top while keeping the inside fudgy.
- Eggs: Add them one at a time and whisk well—I discovered that rushing this step or dumping them in together leads to dense, deflated brownies instead of ones with body.
- Vanilla extract: A teaspoon is enough to round out the chocolate flavor without making it taste like a vanilla cake in disguise.
- All-purpose flour: Keep measuring light and don't pack it down; too much flour turns these into cake-like bites instead of fudgy ones.
- Salt: Just 1/4 teaspoon heightens the chocolate flavor and balances the sweetness.
- Powdered sugar: This dissolves into the milk to create smooth, pipeable icing that sets quickly enough to look polished.
- Milk: Start with 1 teaspoon and add gradually—the icing should be thick enough to hold shape when piped but not so thick it tears when you squeeze the bag.
Tired of Takeout? 🥡
Get 10 meals you can make faster than delivery arrives. Seriously.
One email. No spam. Unsubscribe anytime.
Instructions
- Heat your oven and prep your tin:
- Set the oven to 175°C (350°F) and lightly grease those mini muffin cups or slip in paper liners—this prevents sticking and makes cleanup effortless. The gentle heat ensures even baking without browning the edges too quickly.
- Melt chocolate with butter:
- Combine butter and chocolate chips in a microwave-safe bowl and heat in 30-second bursts, stirring between each one, until completely smooth and glossy. This gentle approach prevents the chocolate from seizing or burning, which happens faster than you'd think.
- Build your batter base:
- Whisk the sugar into the warm chocolate mixture until it looks silky, then add eggs one at a time, whisking well after each so they incorporate fully without creating lumps. Stir in vanilla and you'll notice the batter smell shifts from pure chocolate to something warmer and more complex.
- Fold in dry ingredients gently:
- Add flour and salt, folding with a spatula just until combined—this is where patience pays off because overmixing develops gluten and creates tough brownies instead of tender ones. You want to see just a few streaks of flour disappear before you stop.
- Fill the tin and bake:
- Divide batter evenly, filling each cup about 3/4 full, then slide into the oven for 16–18 minutes until a toothpick inserted in the center comes out with moist crumbs still clinging to it. The brownies will look almost underbaked—that's exactly right because they continue setting as they cool.
- Cool properly for clean removal:
- Let the brownies rest in the tin for 5 minutes so they set just enough to pop out without crumbling, then transfer to a wire rack to cool completely. This step prevents the bottoms from getting soggy from residual steam.
- Make the baseball icing:
- Whisk powdered sugar, 1 teaspoon milk, and vanilla together, then add milk by the half-teaspoon until the icing is thick but pipeable—it should hold a shape but flow smoothly from the bag. Test it on a spare piece of parchment first.
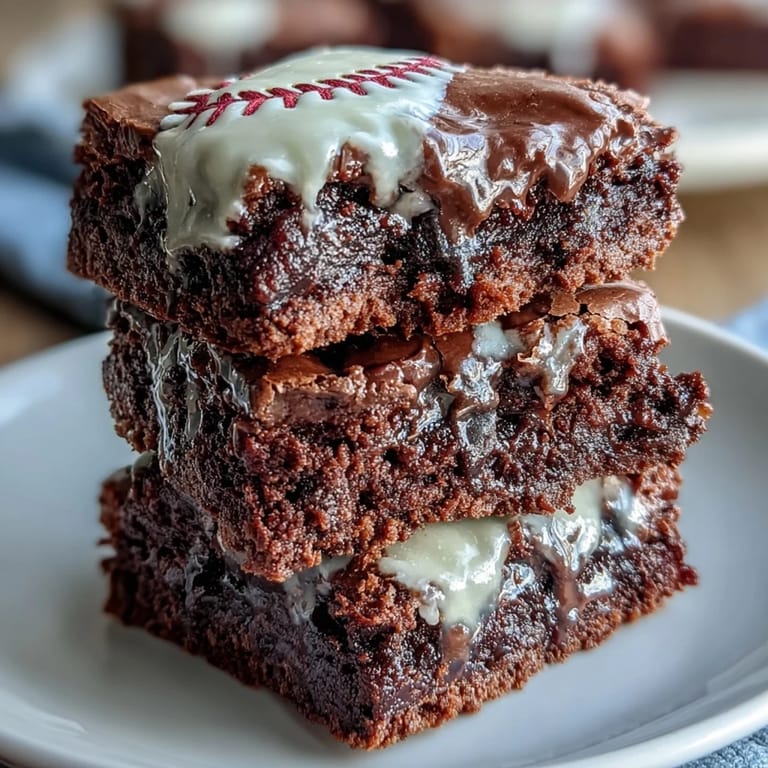
- Pipe the laces:
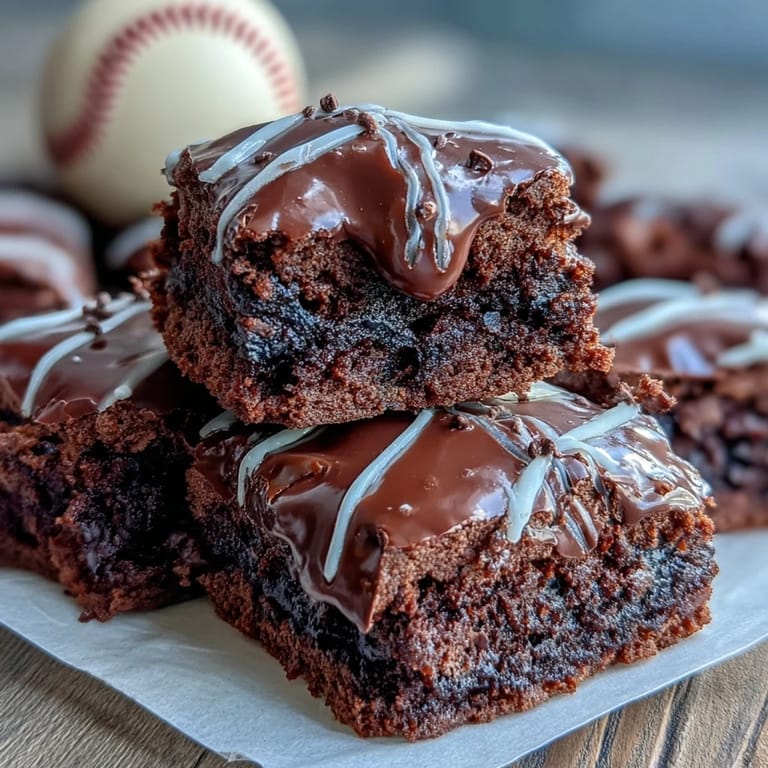
- Transfer icing to a piping bag fitted with a small tip, then pipe two curved lines across each brownie bite to resemble the seams of a baseball. Add small perpendicular lines crossing those curves, and suddenly they look like real baseballs sitting on a plate.
- Set and serve:
- Let the icing dry for 10–15 minutes before stacking or serving so the laces don't smudge. Once set, they're ready to transport, display, or disappear into hungry mouths.
 Save to Pinterest
 The moment I'll never forget is watching a room full of kids at a birthday party stop mid-conversation when they spotted these brownie bites arranged on a platter. They genuinely looked like tiny baseballs, and suddenly everyone was picking them up carefully, admiring them before eating, as if they were too pretty to bite. That's when I understood that food doesn't have to be complicated to feel special—sometimes it just needs a little intentional decoration and a story to go with it.
Why These Brownies Work for Any Occasion
The genius of this recipe isn't just that it tastes good—it's the built-in theme that makes decorating feel purposeful rather than fussy. You could serve these plain at a weeknight dessert and they'd be delicious, but dress them up with icing laces and suddenly you have a showstopper that looks like you spent hours in the kitchen. I've brought them to game days, birthday parties, and even tucked them into lunchboxes, and they always spark a smile because they're both indulgent and playful.
Storage and Make-Ahead Magic
I learned early on that these brownies are actually better if you make them a day ahead—the texture sets deeper and the chocolate flavor becomes more pronounced overnight. Store them in an airtight container at room temperature for up to 3 days, and if you need to pipe the icing ahead, you can do that the morning of serving. The icing stays intact and actually helps keep the brownies moist, which feels like a bonus reward for planning ahead.
Creative Twists Worth Trying
Once you master the basic recipe, the variations practically suggest themselves based on what's in your pantry or what mood you're in. I've added chocolate chips directly into the batter for extra fudginess, swirled in peanut butter, and even topped the bites with a pinch of fleur de sel before baking. If you want authentic baseball vibes, mix a tiny drop of red food coloring into the icing to make the laces truly stand out—it transforms them from cute to eerily realistic.
- Try red food coloring in the icing for authentic baseball laces that'll make sports fans do a double-take.
- Stir chopped nuts or extra chocolate chips into the batter if you want more texture and flavor complexity.
- Dust the finished bites with a whisper of cocoa powder for an extra layer of chocolate depth.
 Save to Pinterest
 These brownie bites taught me that sometimes the most memorable treats are the ones that combine something delicious with a little bit of creative flair. Whenever I make them now, I'm not just baking brownies—I'm creating an excuse to make someone smile.
Recipe FAQs
- → How do I achieve a fudgy texture in these brownie bites?
Using melted semisweet chocolate combined with butter and limiting flour ensures a moist, fudgy consistency. Avoid overmixing the batter to keep them tender.
- → What is the best way to pipe the white icing to resemble baseball laces?
Use a piping bag fitted with a small round tip to create two curved lines on top of each brownie bite, then add small perpendicular stitches crossing the curves for a lace effect.
- → Can I prepare the batter ahead of time?
Yes, you can mix the batter and refrigerate it for a few hours before baking. Just allow it to come to room temperature before spooning into the mini muffin tin.
- → How should these brownie bites be stored?
Store them in an airtight container at room temperature for up to 3 days to maintain freshness and texture.
- → Is it possible to add variations to the brownie bites?
Feel free to mix in extra chocolate chips or chopped nuts into the batter before baking for additional texture and flavor.