 Save to Pinterest
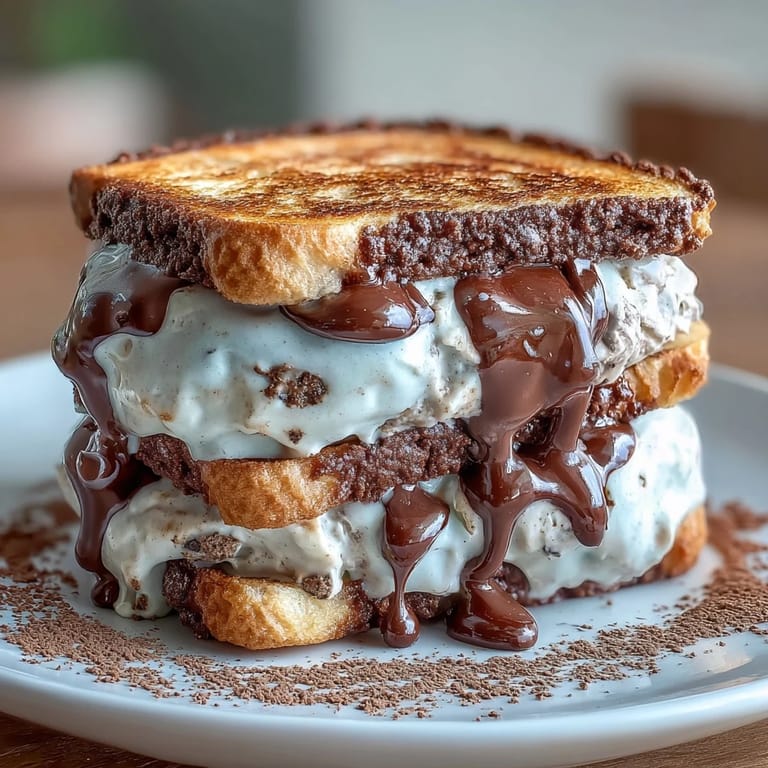
 My friend texted me a photo of her vanilla frappuccino one summer afternoon, and I stared at it thinking: why wait in line for that when I could have something better at home? That's when I decided to chase the magic of that drink in frozen form, layered between espresso cookies that actually taste like they belong in a coffee shop. The result was so ridiculously good that I made three batches in one week, each one disappearing faster than the last.
I brought these to a potluck on a sweltering July evening, and watching people's faces light up when they bit through that chocolate-espresso shell into cool vanilla was worth every minute of prep. One person asked if I'd made them professionally, which felt like the highest compliment my kitchen has ever received.
Ingredients
- Unsalted butter: Use softened butter at room temperature so it creams properly with the sugars, creating that light, fluffy base for the cookies.
- Brown sugar and granulated sugar: The combination gives the cookies depth and chewiness that keeps them tender even when frozen.
- Large eggs: Room temperature eggs blend in smoothly and help bind everything together without overmixing.
- Vanilla extract: This bridges the espresso and vanilla flavors, making both taste more vivid.
- All-purpose flour: Don't sift unless your flour is packed; spoon it into the measuring cup and level it off.
- Unsweetened cocoa powder: This adds depth without sweetness, letting the espresso flavor shine through.
- Instant espresso powder: The real star here; don't skip it or use regular coffee, as espresso powder is concentrated and won't add moisture.
- Baking soda: Works with the cocoa and brown sugar to create that chewy texture.
- Heavy cream: The base of silky ice cream; don't use ultra-pasteurized if you can help it, as it whips too easily.
- Whole milk: Balances the richness so the ice cream stays creamy without being heavy.
- Vanilla bean: Real vanilla beans make a visible difference, but vanilla bean paste works beautifully if beans feel too fancy.
- Granulated sugar: Sweetens the ice cream base and helps create a smooth, scoopable texture when frozen.
Tired of Takeout? 🥡
Get 10 meals you can make faster than delivery arrives. Seriously.
One email. No spam. Unsubscribe anytime.
Instructions
- Make the ice cream base first:
- Combine milk, sugar, vanilla seeds and pod (or paste), and salt in a saucepan over medium heat, stirring gently until the sugar dissolves and the mixture steams softly. You'll smell the vanilla releasing into the warm milk, and that's when you know it's ready to come off the heat.
- Cool everything down:
- Stir in the heavy cream after removing from heat, then refrigerate for at least two hours until it's genuinely cold. This step matters more than you'd think; warm ice cream base won't churn properly and you'll end up with something grainy.
- Churn your ice cream:
- Follow your ice cream maker's instructions, which usually means pouring the cold mixture in and letting it run for 20 to 25 minutes. The ice cream will go from liquid to soft-serve consistency, at which point you spread it into a parchment-lined 9x13-inch pan to about 1 inch thick and freeze for at least two hours until firm.
- Cream the butter and sugars:
- Use an electric mixer to beat softened butter with brown sugar and granulated sugar until it's light, fluffy, and noticeably paler than when you started. This takes about three to four minutes and creates air pockets that make the cookies tender.
- Add eggs and vanilla:
- Beat in eggs one at a time, making sure each one is fully incorporated before adding the next, then add vanilla extract. The mixture should look smooth and slightly increased in volume.
- Combine dry and wet:
- In a separate bowl, whisk together flour, cocoa powder, espresso powder, baking soda, and salt until they're evenly distributed. Gently fold or stir the dry mixture into the wet mixture until just combined; overmixing toughens the cookies.
- Roll and cut the dough:
- Divide dough in half and roll each portion between two sheets of parchment to about 1/4 inch thickness, then use a 3-inch round cutter to cut 16 cookies total. This is tedious but worth it because uniform cookies mean even ice cream sandwiches.
- Bake until set:
- Bake on parchment-lined sheets at 350°F for 10 to 12 minutes until the edges feel set but the centers still have a tiny bit of give. They'll continue cooking slightly after you pull them out, and cooling on a wire rack keeps the bottoms from getting soggy.
- Assemble with care:
- Remove the frozen ice cream slab from the pan and cut into eight rounds using that same 3-inch cutter, then sandwich each round between two cooled cookies. Wrap each sandwich in parchment and freeze for at least one hour before serving, though they actually get better texture the longer they freeze.
 Save to Pinterest
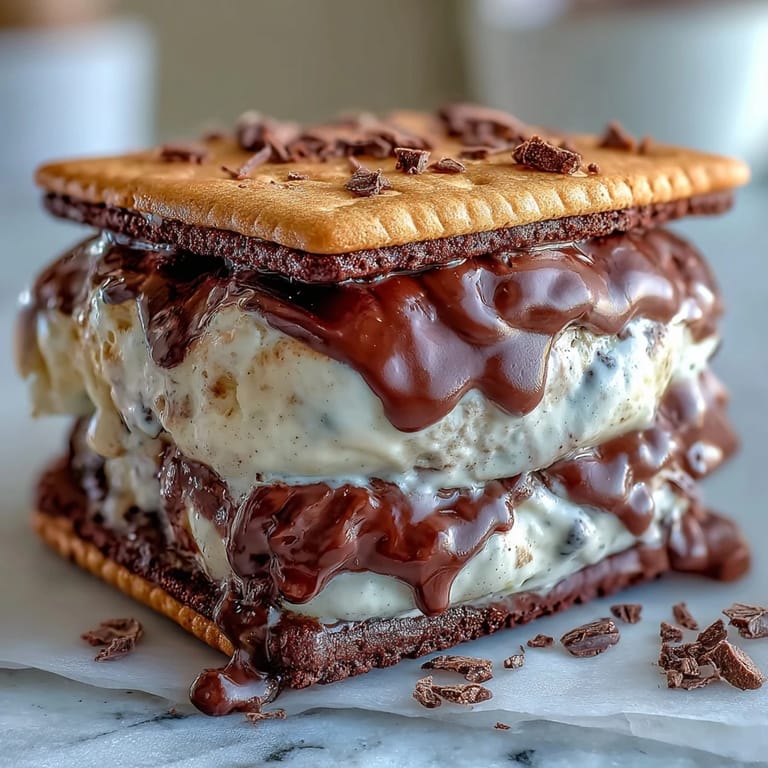
 These sandwiches have a way of turning an ordinary afternoon into something memorable. They're the kind of treat that makes people slow down and actually taste what they're eating.
The Secret to Tender Espresso Cookies
The cocoa powder and espresso seem like they'd make the cookies dry and bitter, but the combination of brown sugar and whole eggs keeps them moist and chewy. I learned this the hard way by over-baking them my first attempt, watching them turn hard as hockey pucks while the espresso flavor went sharp and unpleasant. Now I pull them out when the edges look set but the center still jiggles slightly.
Why Vanilla Bean Matters Here
Vanilla bean paste or fresh vanilla bean brings a subtle floral note that supermarket vanilla extract can't quite match, and when it's the main flavor in your ice cream, that difference becomes noticeable. The little vanilla specks also look beautiful and remind people that they're eating something made with real ingredients, not just chemistry.
Make Them Even Better
Once you've nailed the basic sandwich, there are endless ways to dress them up and make them feel like your own creation. A quick roll in something crunchy transforms them from homemade to show-stopping.
- Roll the sandwich edges in mini chocolate chips, crushed espresso beans, or even freeze-dried coffee bits before the final freeze for texture that stays crispy.
- Drizzle melted dark chocolate over the top and let it set for a professional-looking finish that tastes incredible.
- If you don't have an ice cream maker, freeze the base in a shallow dish and stir it every 30 minutes until creamy, or just use quality store-bought vanilla bean ice cream and call it a win.
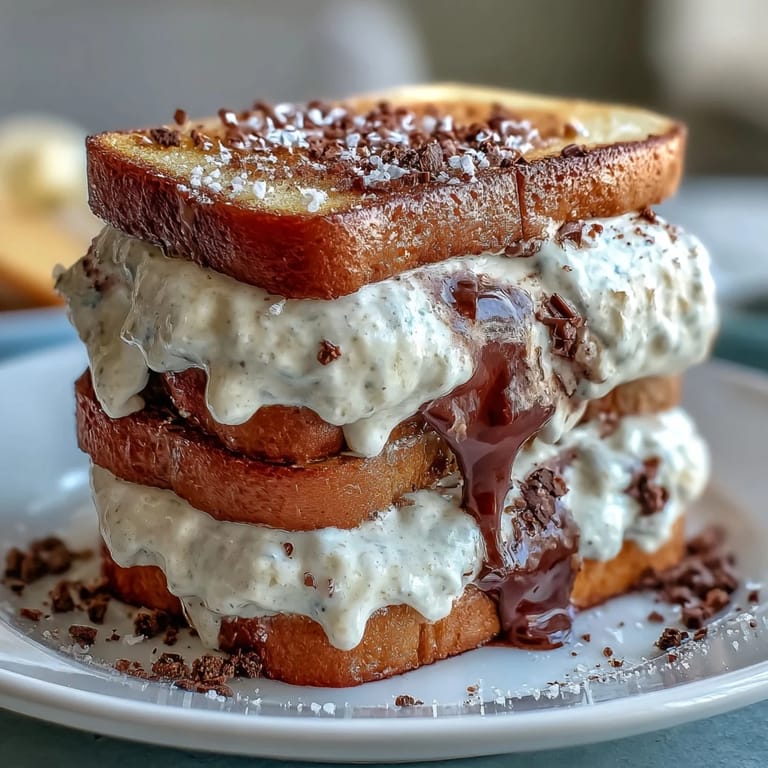 Save to Pinterest
 These sandwiches sit somewhere between a coffee shop dream and homemade comfort, and that's exactly where the magic lives. Make them once and you'll understand why I can't stop making them.
Recipe FAQs
- → What can be used if I don't have an ice cream maker?
Freeze the ice cream base in a shallow dish, stirring every 30 minutes until it reaches a creamy, firm texture similar to churned ice cream.
- → How do I enhance the crunch of these sandwiches?
Roll the edges of the assembled sandwiches in mini chocolate chips or crushed espresso beans before freezing for added texture.
- → Can store-bought vanilla bean ice cream be used?
Yes, substituting with high-quality store-bought vanilla bean ice cream can save preparation time while maintaining flavor.
- → What is the best way to bake the espresso cookies evenly?
Roll the dough to an even 1/4 inch thickness and use a consistent 3-inch cutter before baking at 350°F for 10–12 minutes.
- → How should the ice cream be prepared before assembly?
Chill the ice cream base thoroughly in the refrigerator, churn it, then freeze spread in a pan until firm enough to cut into rounds.