 Save to Pinterest
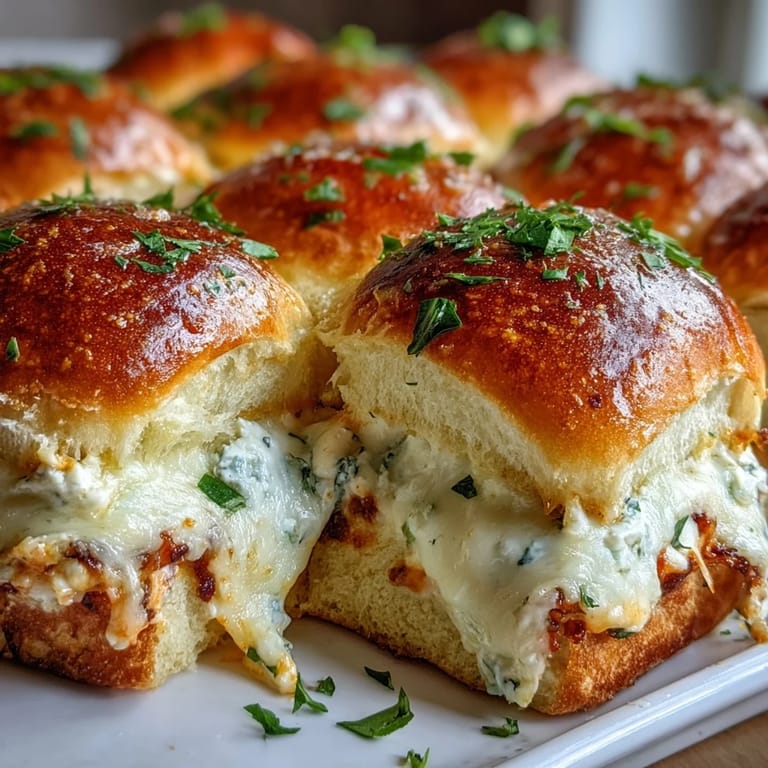
 My neighbor brought these to a block party last summer, and I watched a dozen disappear in under ten minutes. The smell alone pulled people across the yard: tangy Buffalo sauce, melted cheese, and buttery garlic working together like magic. I begged for the recipe right there on her porch, balancing a paper plate and scribbling notes on a napkin. She laughed and said she'd invented them by accident, trying to use up leftover chicken dip. Now they're my secret weapon whenever I need something that actually gets eaten instead of politely ignored.
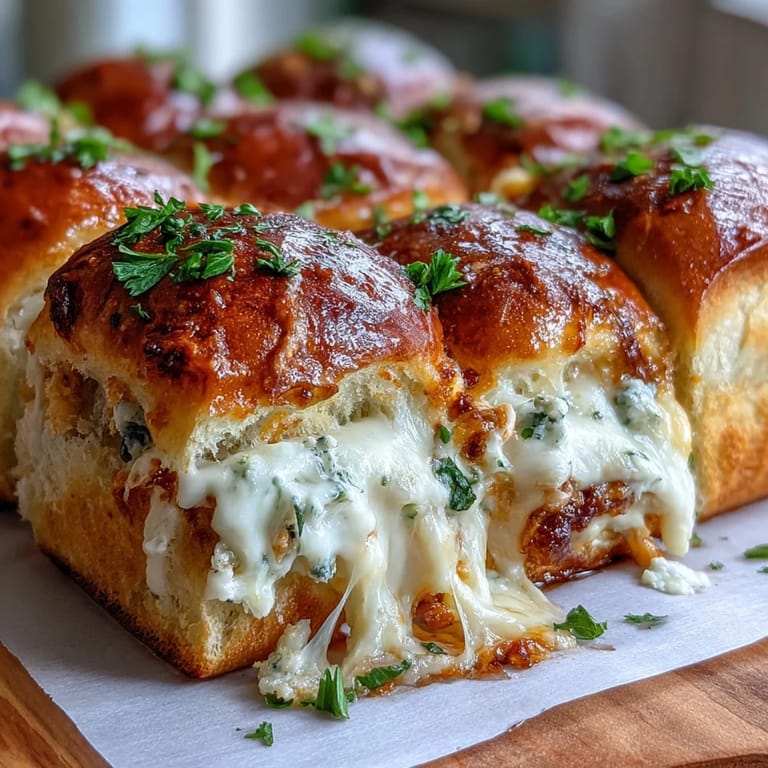
I made these for my brother's birthday last winter, and he texted me three days later asking if I had any left. His friends had apparently talked about them nonstop, debating whether the garlic butter or the cheesy layer was the real hero. I'd doubled the batch that night just in case, and still ran out before halftime ended. Watching everyone pull apart the sliders, cheese stretching between fingers, reminded me why I love cooking for people. It's never really about the food alone.
Ingredients
- Cooked chicken breast, shredded: Rotisserie chicken works perfectly here and saves you serious time, just pull the meat and toss the skin.
- Buffalo wing sauce: Use your favorite brand, but taste it first because some are much hotter than others and you can always add more.
- Cream cheese, softened: Let it sit on the counter for 30 minutes so it blends smoothly without lumps that ruin the texture.
- Ranch dressing: The bottled kind is fine, but homemade ranch takes these over the top if you have five extra minutes.
- Sour cream: This cools down the Buffalo heat just enough and adds a tangy richness that balances everything.
- Shredded mozzarella cheese: Mozzarella melts into those beautiful cheese pulls everyone loves in photos and real life.
- Shredded cheddar cheese: Sharp cheddar brings flavor that mozzarella alone can't deliver, so don't skip it.
- Slider buns: Hawaiian rolls are sweet and soft, but any slider buns work as long as they're fresh and squishy.
- Unsalted butter, melted: Salted butter can make the tops too salty once the garlic powder goes on, so stick with unsalted.
- Garlic powder: Fresh garlic burns too easily in the oven, but garlic powder toasts into the butter and creates that golden, fragrant crust.
- Chopped fresh parsley: Totally optional, but it makes the finished sliders look intentional instead of thrown together.
Tired of Takeout? 🥡
Get 10 meals you can make faster than delivery arrives. Seriously.
One email. No spam. Unsubscribe anytime.
Instructions
- Prep the oven and dish:
- Set your oven to 350°F and give your baking dish a light coat of butter or cooking spray. This keeps the bottoms from sticking and makes cleanup easier later.
- Mix the Buffalo chicken filling:
- Combine the shredded chicken, Buffalo sauce, cream cheese, ranch, and sour cream in a big bowl, stirring until everything is creamy and evenly coated. The cream cheese might resist at first, but keep mixing and it will smooth out.
- Fold in half the cheese:
- Stir in half the mozzarella and half the cheddar so the filling gets cheesy and thick. Save the rest for the top layer where it can melt into a golden blanket.
- Slice and arrange the buns:
- Cut the slider buns in half horizontally, keeping them connected like one big slab if you can, then nestle the bottom halves into your baking dish. This makes assembly fast and keeps them from sliding around.
- Spread the filling:
- Spoon the Buffalo chicken mixture evenly over the bottom buns, spreading it to the edges so every bite gets loaded. Don't be shy here, pile it on.
- Add the remaining cheese:
- Sprinkle the rest of the mozzarella and cheddar over the chicken layer, covering it completely. This top layer will bubble and brown into the kind of cheese that makes people reach for seconds.
- Top with the bun halves:
- Set the top halves of the buns over the cheese, pressing down gently so they nestle in. They'll soak up some of that Buffalo flavor while baking.
- Brush with garlic butter:
- Stir the melted butter and garlic powder together, then brush it all over the tops of the buns. This step is what makes them golden and irresistible.
- Bake covered, then uncovered:
- Cover the dish with foil and bake for 15 minutes to heat everything through without drying out the tops. Remove the foil and bake another 8 to 10 minutes until the cheese bubbles and the tops turn golden brown.
- Garnish and slice:
- Sprinkle chopped parsley over the top if you want, then cut between the buns to separate them. Serve these warm, while the cheese is still stretchy and the buns are soft.
 Save to Pinterest
 The first time I brought these to a potluck, someone asked if I'd ordered them from a restaurant. I laughed because they're genuinely easy, but they look and taste like you spent hours fussing. That's the beauty of sliders like these: they feel special without the stress. My friend still texts me every few months asking when I'm making them again, and honestly, that never gets old.
Make Ahead and Storage
You can assemble these completely, cover them tightly with plastic wrap, and refrigerate for up to a day before baking. Just add five extra minutes to the covered baking time since they'll be cold. Leftovers keep in the fridge for three days and reheat well in a 300°F oven for about ten minutes, though the microwave works in a pinch if you're impatient. I've never tried freezing them because they disappear too fast, but I imagine they'd hold up fine if wrapped well.
Flavor Variations
If you want more heat, stir in a few dashes of hot sauce or sprinkle red pepper flakes over the filling. For a milder version, cut the Buffalo sauce in half and add extra ranch or sour cream. I've also swapped blue cheese dressing for ranch when I'm feeling bold, and it gives the whole thing a sharper, tangier edge that some people love. Crumbled bacon or chopped green onions mixed into the filling add little bursts of flavor that make each bite different.
Serving Suggestions
These sliders are perfect on their own, but I like putting out celery sticks, carrot sticks, and a small bowl of extra Buffalo sauce for people who want to dip. A simple green salad with a light vinaigrette balances the richness without stealing the spotlight. They're ideal for game days, casual parties, or any gathering where you need finger food that actually fills people up.
- Serve with ranch or blue cheese dressing on the side for dipping.
- Pair with crispy potato wedges or sweet potato fries for a full spread.
- Set out napkins because these get delightfully messy and nobody will care.
 Save to Pinterest
 These sliders have earned a permanent spot in my party rotation, right next to my favorite dips and the cheese board I never get tired of. Make them once and you'll understand why people ask for the recipe before they've even finished eating.
Recipe FAQs
- → Can I make these sliders ahead of time?
Yes, assemble the sliders completely, cover tightly with foil, and refrigerate for up to 24 hours before baking. Add a few extra minutes to the covered baking time if starting from cold.
- → What's the best way to shred the chicken?
Use two forks to pull apart cooked chicken breasts while still warm, or use a hand mixer on low speed for quick shredding. Rotisserie chicken works perfectly and saves time.
- → Can I adjust the spice level?
Absolutely. Use mild Buffalo sauce for less heat, or add extra hot sauce and cayenne pepper for more kick. You can also serve with additional Buffalo sauce on the side.
- → What can I substitute for Hawaiian rolls?
Any soft dinner rolls or slider buns work well. Brioche buns add a buttery richness, while potato rolls provide extra softness. Just keep the buns connected for easier assembly.
- → How do I store leftovers?
Store cooled sliders in an airtight container in the refrigerator for up to 3 days. Reheat in a 300°F oven for 10-12 minutes until warmed through and cheese melts again.
- → Can I freeze these sliders?
Yes, freeze assembled unbaked sliders wrapped tightly in foil for up to 2 months. Bake directly from frozen, adding 10-15 minutes to the covered baking time.