 Save to Pinterest
 My sister showed up at my door one Saturday morning with a bag of cereal, a bag of marshmallows, and a mischievous grin. She wanted to recreate the treats we used to beg our mom to make, but with a twist: chocolate on top. We melted, stirred, and giggled our way through the whole process, and when we finally bit into those glossy, sprinkle-covered squares, we both agreed they were better than anything we remembered from childhood.
I brought a tray of these to a potluck once, and they disappeared before the main course was even served. A neighbor pulled me aside later to ask for the recipe, convinced I had ordered them from some fancy dessert shop. I loved watching her face when I explained it was just cereal, marshmallows, and chocolate—nothing fancy, just a little extra love in the presentation.
Ingredients
- Unsalted butter: Melts the marshmallows smoothly and adds richness without making the treats greasy if you measure carefully.
- Mini marshmallows: They melt faster and more evenly than large ones, creating that perfect gooey binder without hot spots.
- Rice Krispies cereal: The star of the show, offering that signature snap and crunch in every bite.
- Fine sea salt: Just a pinch balances the sweetness and brings out the chocolate flavor beautifully.
- Semisweet or dark chocolate chips: Choose based on how sweet you want the finish, dark chocolate adds a sophisticated edge.
- Vegetable oil or coconut oil: A tiny bit helps the chocolate spread smoothly and gives it a glossy, professional look.
- Rainbow sprinkles or chopped nuts: Optional but delightful, they add color, crunch, and personality to each bar.
Tired of Takeout? 🥡
Get 10 meals you can make faster than delivery arrives. Seriously.
One email. No spam. Unsubscribe anytime.
Instructions
- Prep your pan:
- Grease your square pan generously with butter so the treats lift out cleanly later. If you have parchment paper, line it for even easier removal.
- Melt the butter:
- Use low heat and stir constantly to keep the butter from browning, which can add an unwanted bitter note.
- Melt the marshmallows:
- Add them to the melted butter and keep stirring until the mixture is completely smooth and no lumps remain. This takes patience but makes all the difference.
- Season the mixture:
- Stir in the sea salt now if you are using it, mixing thoroughly so every bite gets a hint of balance.
- Fold in the cereal:
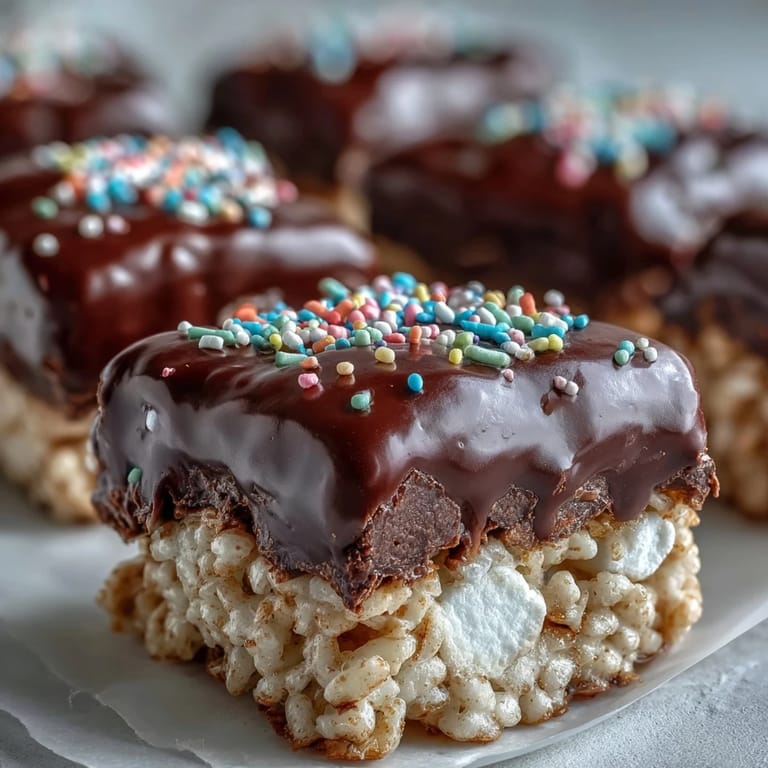
- Remove the pan from heat and add the Rice Krispies, folding gently with a spatula to coat every piece without crushing them.
- Press into the pan:
- Transfer the mixture to your prepared pan and press it down evenly with a buttered spatula or your hands. Firm pressure creates bars that hold together beautifully.
- Let it rest:
- Allow the base to cool at room temperature for about 10 minutes so it sets slightly before adding chocolate.
- Melt the chocolate:
- Combine chocolate chips and oil in a microwave-safe bowl, then heat in 30-second bursts, stirring after each until smooth and glossy.
- Pour and spread:
- Pour the melted chocolate over the cooled cereal layer and spread it evenly with an offset spatula or the back of a spoon.
- Add the garnish:
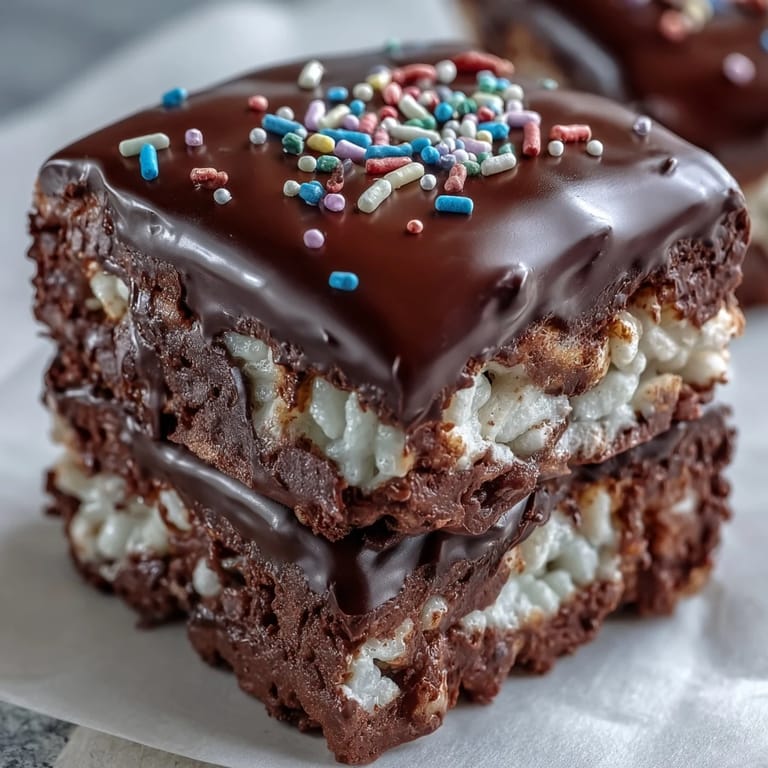
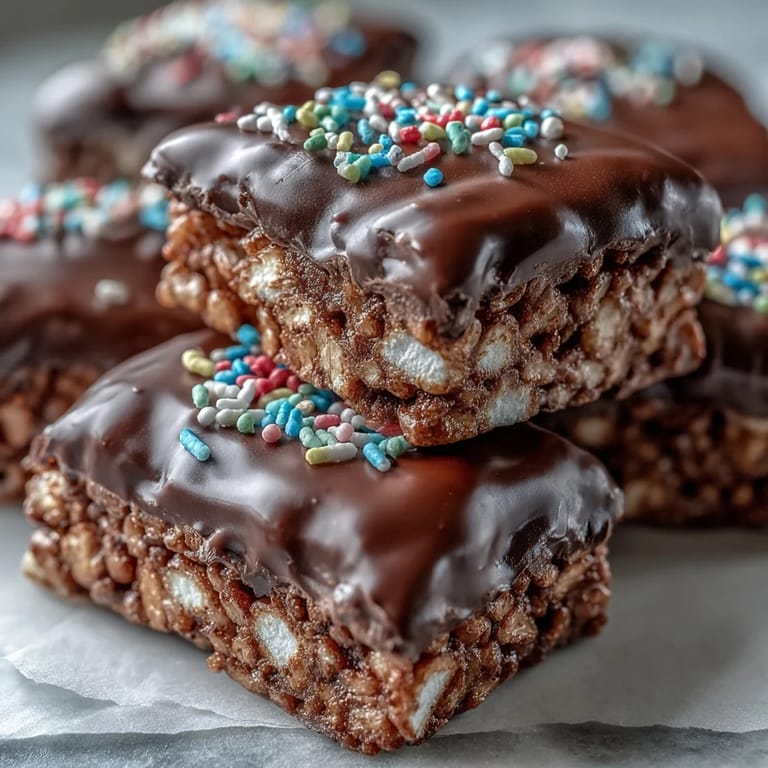
- Sprinkle immediately with rainbow sprinkles or chopped nuts while the chocolate is still wet so they stick.
- Set the chocolate:
- Let the treats sit at room temperature for at least an hour, or pop them in the fridge for 20 to 30 minutes if you are in a hurry.
- Cut into bars:
- Once the chocolate is firm, lift the block out and cut it into 12 to 16 bars with a sharp knife, wiping the blade between cuts for clean edges.
 Save to Pinterest
 One evening, my nephew helped me make these and insisted on adding way too many sprinkles. The result was a riot of color that made everyone smile, and he beamed with pride every time someone complimented his creation. That batch taught me that sometimes the imperfect, over-the-top versions are the ones people remember most.
Storing Your Treats
These bars keep beautifully in an airtight container at room temperature for up to three days, though they rarely last that long in my house. If you want them to stay extra firm or live in a warm climate, the fridge works perfectly and they will hold for up to a week. Just let them sit out for a few minutes before serving so the chocolate is not too hard to bite into.
Flavor Twists
I have made these with white chocolate and pastel sprinkles for a baby shower, and they looked like they came from a boutique bakery. You can also stir a half teaspoon of vanilla extract into the melted marshmallows for a subtle warmth, or swap in crunchy peanut butter for a tablespoon of the butter if you want a nutty undertone. Each variation feels like a new discovery.
Serving Suggestions
These bars shine at birthday parties, bake sales, and holiday gatherings, but they are just as perfect for a quiet afternoon treat with coffee. I like to cut them into small squares and arrange them on a platter with fresh berries for a dessert spread that looks effortlessly elegant. They also make wonderful gifts when wrapped in cellophane bags with a ribbon.
- Serve alongside vanilla ice cream for an indulgent sundae base.
- Pack them in lunchboxes for a nostalgic midday surprise.
- Stack them on a tiered stand for a playful dessert table centerpiece.
 Save to Pinterest
 These treats remind me that some of the best recipes are the ones we grow up with, then make our own. I hope they bring you as much joy as they have brought my kitchen.
Recipe FAQs
- → How long do these treats stay fresh?
Store in an airtight container at room temperature for up to 3 days or refrigerate for up to a week. The chocolate may develop a slight bloom if refrigerated, but this doesn't affect taste.
- → Can I use different types of chocolate?
Absolutely! Semisweet, dark, milk chocolate, or even white chocolate work beautifully. Just keep the same ratio of chocolate chips to oil for proper melting consistency.
- → Why add oil to the chocolate?
The vegetable or coconut oil helps the chocolate melt smoothly and creates a glossy finish. It also prevents the chocolate from seizing and makes it easier to cut cleanly.
- → How do I prevent the cereal from getting stale?
Press the mixture firmly into the pan to remove air pockets, then let it cool completely before adding the chocolate topping. Store in an airtight container as soon as the chocolate has set.
- → Can I make these without butter?
You can substitute coconut oil or margarine for butter, though the flavor and texture will vary slightly. Coconut oil works particularly well and adds a subtle tropical note.
- → What's the best way to cut clean squares?
Let the chocolate set completely at room temperature or refrigerate briefly. Use a sharp knife warmed under hot water and wiped dry between cuts for the cleanest edges.